Design Your Own Art Project
Project Description: For this project we started out by researching and finding a type of art or photography that interested us. My group decided to try forced perspective and optical illusion photography. We research topics and techniques that would help us create a perfect image and make our photography pop out. We found ideas to give us inspiration and to try our self. We went out and tried different ideas and finally came up with our final photos.
|
Final Product
Pre-Assesment
|
Artist Statement:
At the beginning of this project we weren’t really sure what we wanted to do. We researched many ideas and found one that we were really interested in, forced perspective photography and optical illusion. Forced Perspective and Optical illusion caught our eyes because of the effect it has on the audience, it makes people laugh and have fun. We weren’t really sure how to take those types of photos and make them look believable, so we decided to research different techniques we could use to accomplish our ideas. We research point of view, camera angles, and lighting. Once we were done researching we went and started taking our photos. We took a couple at night and then a couple in the day time, to give it two different perspectives. For the night we took photos of the moon and during the day we took pictures of the clouds, sun and each other. While taking the photos we learned how to use perspective while and by using perspective it turned the photos into an optical illusions and forced perspective. We also learned how much distance effects the photo and how it can totally change the look of what your taking a picture of. This project allowed us to explore different types of photography and made our love for taking photos grow even more.
|
Environmental Documentary Project
Project Description: For this project we had to make a documentary about an environmental issue. We had to find interviews and get footage that we either made or got from someone else. We took the skills we learned about light and rule of thirds to make our interviews and footage pop out and look professional. Once we got all of our footage we started putting together and editing it. Our group took a lot of time on editing and change things often. Once we were done with editing and putting all the footage together our documentary was finished.
Reflection:
From completing this project I learned why artists produce preliminary plans. They have to plan out what they are going to make, so they have a chance to change things around and look at what other ideas they could put in there art piece. If they don't like something they can always go back to there brain storm or story line and change it. It also gives them a reference of what they are going to do and allows there thoughts to flow, without brainstorming and creating a plan it can be hard to create an art piece and the final product isn't always the best because you didn't think it out. Another thing I will take away from this project is how problem solving skills are used to make an art piece. When you are creating an art piece you always have to go back and revise and edit your piece. You have to communication and collaboration with others to figure out what you could change, add, or get more input on how to convey the message of the art piece. The last thing I will take away is art is everywhere and is used in everyday life. We use art in everyday life to show a meaning and send a message to the world. Paintings on the wall or photography shows and experience and try's to bring your attention to what they are trying to say.
From completing this project I learned why artists produce preliminary plans. They have to plan out what they are going to make, so they have a chance to change things around and look at what other ideas they could put in there art piece. If they don't like something they can always go back to there brain storm or story line and change it. It also gives them a reference of what they are going to do and allows there thoughts to flow, without brainstorming and creating a plan it can be hard to create an art piece and the final product isn't always the best because you didn't think it out. Another thing I will take away from this project is how problem solving skills are used to make an art piece. When you are creating an art piece you always have to go back and revise and edit your piece. You have to communication and collaboration with others to figure out what you could change, add, or get more input on how to convey the message of the art piece. The last thing I will take away is art is everywhere and is used in everyday life. We use art in everyday life to show a meaning and send a message to the world. Paintings on the wall or photography shows and experience and try's to bring your attention to what they are trying to say.
Mini Stop Motion Project
|
|
Project Description: Take a sequence of photos that in the end create a stop motion animation/film.
For this project we took our pictures outside, which aloud us to use the natural light from the sun. Once we were done taking our pictures we took all of our photos and re-sized them in Photoshop. Once all the pictures were re-sized and number, we then took all the photos into Adobe Flash to make the photos run like a stop motion. For our environmental documentary I feel what we learned in this project we could use for that project. Such as lighting techniques and taking the photos we took and putting them in Photoshop and Adobe flash to make a sequence. I think what I learned in this project I just wont use in my environmental document but also in other projects we do throughout the year. |
Design a Logo
Project Description: Create a logo for your name that has a personal connection to you
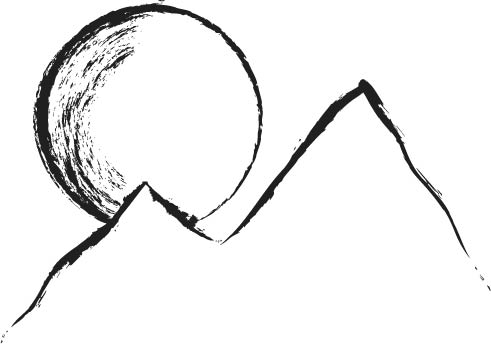
Final Logo
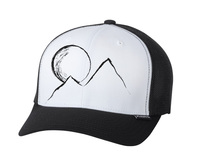
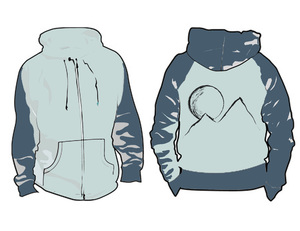
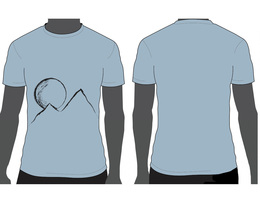
Final Logos on Clothing
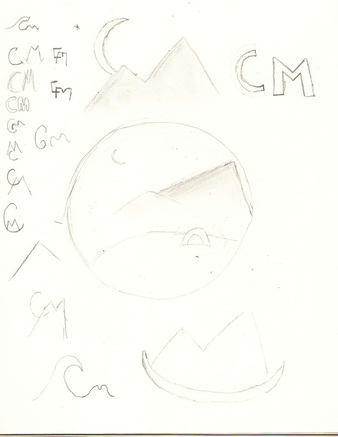
Preliminary Sketches
|

Reflection:
|
|
For my logo I made my initials(CM) into two mountains and a moon. I feel these two things represent me the most because as a person I am very outdoors and love to explore mountains every second of the day, even at night. Ever since I was little I always enjoyed going on night hikes and just stopping and looking at the stars and the moons.
For this project I think I learned the most about Adobe Illustrator and how to use it. Going into this project I was nervous and anxious, I had no idea what I wanted my logo to look like and I had no experience in adobe illustrator except for one worksheet that I had completed. Once I got my logo and was ready to scan it into adobe illustrator I was lost. I didn’t know how to get my paintbrush tool to work and didn’t know how to make my drawing pop out more. I ended up messing around with the settings and getting the teacher's help. I was able to change the paint brush stroke and add lines to my original drawing. Now my logo is to a place where I’m in love with it. The key thing I plan on taking away from this project is how much time and effort it takes in creating something so small. You have to come up with many ideas before you find the perfect one and once you have the perfect design you still have to go back and make refinements and get peoples opinions on what they think, so you can change it and make your final copy. |
Self-Portrait
Project Objective: Create a self-portrait or develop a series of self portraits inspired by your personal and/or intellectual growth this year.
|
Reflection:
|
Teacher Creature Project:
Our Project Objectives: Envision and Critique to reflect. Recognize, demonstrate, and debate philosophic arguments about the nature of art and beauty (aesthetics).

|
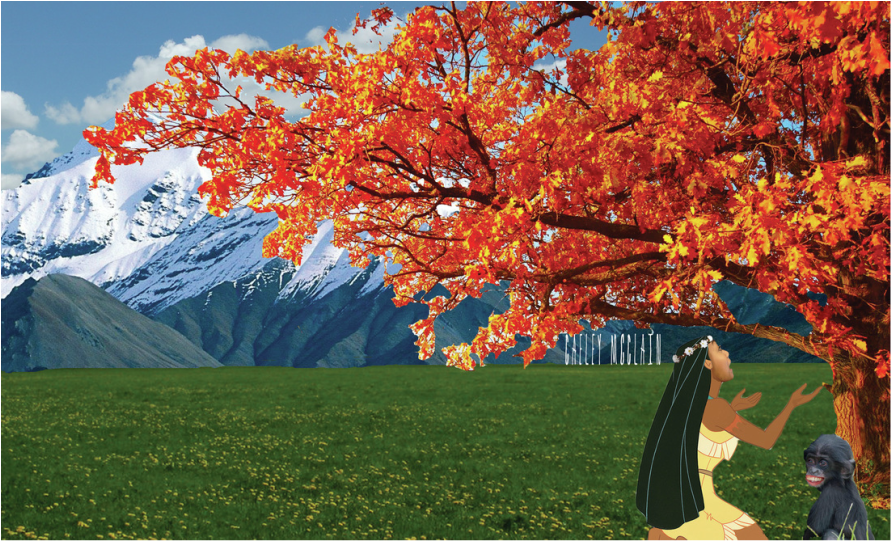
Project Reflection:The first thing I did to make my teacher creature project was work on the background. Most people I asked in my survey liked winter and mountains, so I decided to put snowy mountains and then have a field because I needed a place to put my objects. I then changed the clouds and added a fall tree. The fall tree was some what hard, I had to erase the area in between the branches so it would match the background. Once I was done erasing, Pocahontas was put into the picture. In the survey my math teacher, Aliza said her favorite Disney character was Pocahontas, I took the information and placed her face onto Pocahontas's body. One problem I had at this part was that there skin tones didn't match. I had trouble figuring out how to make the skin of Pocahontas darker, One of my friends gave me an idea on what I could do and it worked out enough to make the both skin tones look alike. In the survey I also found out that Steve likes bonobo's (Type of monkey), so I put a bonobo with Steve face features on to my teacher creature project. The last and final step I did was adding the flower crown to Pocahontas's head. I think throughout this whole project the hardest part was making Pocahontas skin tone the same as Aliza, getting the tree to match the background, and figuring out what tools I should use for what. Through this project and the previous project, I'm slowly learning that as an artist I like to incorporate the outdoors and mountain, this could be influenced by where I live.
|
Photoshop Tutorials:
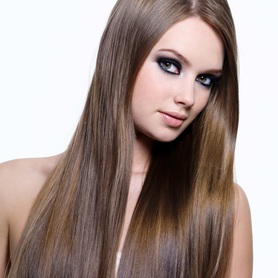
Original Image (Before)
|
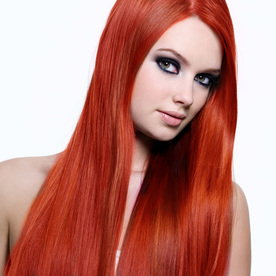
Photoshopped image (After)
|
- I took the paint brush and made it soft light to morph the hair color.
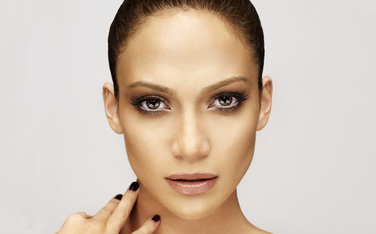
Original Image (Before)
|
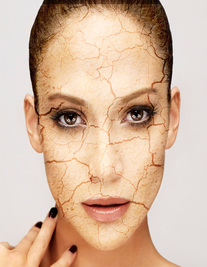
Photoshopped Image (After)
|
- In order to crack the face, I put a dried dirt image over a girls face and put the image on soft light.
Understanding Distance With Scale and Proportion
|
Landscape:

|
Reflection:During this project I learned that Foreground is usually the large sized pictures and draw your attention straight to it. The Middle-ground in a picture is where objects are smaller then the foreground, which makes the object blur together and details/texture become softer. Some objects that are large in the Middle-ground are seen individually. In the background all the objects are blurred together and have soft edges. Also, colors are usually low contrast. so the colors are less vibrant. In the Background Haze is often presented. We also talked about Scale and Proportion. Scale and Proportion is the size of an object in relation in to another objects size. In this project I got to use Photoshop, in Photoshop I used the Lasso tool, the select tool, the re-size tool, and the text tool.
|
Resources:
Photoshop CC Basics: http://jetsetcom.net/useful-resources/photoshop-cc-resources.html
SHOW and TELL Photoshop Basics: http://simplephotoshop.com/photoshop_tools/index.htm
Free Photoshop Brushes (brusheezy.com)
Free Fonts (dafont.com)
55 Ways to Use Text
100 Ways to Use Text
Youtube Tutorials
Digital Art Online
